

Almost everyone has their own embarrassing story to tell about copying content from an old proposal or sales letter and inadvertently leaving in the old customer name.
Needless to say we want to take steps to safeguard against this when preparing content for reuse.
But first another choice needs to be made. Do you replace old customer names with generic terms, like ‘your company’ or with placeholders to be updated with the current customer information?
It certainly makes for less work and worry to genericize the reusable content. But if you elect to customize the final documents with the current customer information, here are tips to make the process of customization easier and more reliable.
There are a number of documentation automation products on the market that can help you automate the process of document customization (including us at Expedience), but in this post we’ll look at some simple tricks that don’t require any software product at all, besides Microsoft Word itself.
The first step to developing a customization process is to develop a single consistent list of customization placeholders. For example, if you want to refer to the client’s company in your reusable content, settle on a single placeholder to be used: ‘ClientCompany’ or ‘CustomerCompany’ but not both. Keep the list handy so you don’t forget your naming convention later.
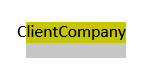
To make sure that you don’t overlook replacing a placeholder, settle on a distinctive way to format the placeholder. For instance, make it bold and red (assuming red is not used elsewhere). Or Highlight the word with yellow.
Again, be consistent. Pick one method and stick with it. Here are some examples:
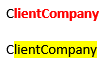
There are two things to notice about the above example:
First, I wrote the placeholder as a single term with no spaces. This makes it easier to select and replace. Double clicking will select the entire placeholder.
Secondly, the first character of each placeholder is left unformatted. The reason for this is that when the placeholder is replaced, the replacement text takes on the formatting of the first character. The distinctive formatting is removed automatically, eliminating the need to remove it ourselves. That way it is easy to spot but requires no extra effort after it is replaced.
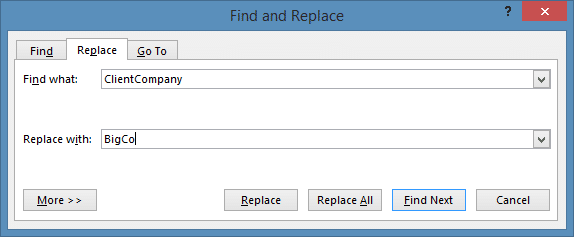
Once the new document is finished, you can replace the placeholders by simply using Word’s ‘Find and Replace’ dialog box.
Select a placeholder, enter Control + H or click the ‘Replace’ button in the ‘Editing’ group on the ‘Home’ tab).
Enter the replacement name in the replace box and click the ‘Replace All’ button:
How can you be sure that you have replaced all of the placeholders in the document? After all, leaving in a stray company name placeholder is just as bad as leaving in the wrong company name.
Here is where having a consistent highlighting method proves very useful.
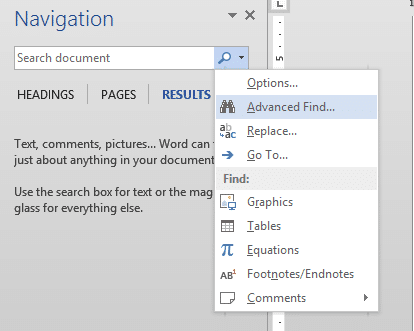
Not only can you search for placeholders in the Find dialog box, you can also search for placeholder formatting.
To search for highlighted words (our second example), you will need to use the ‘Advanced Find’ dialog. Enter Control + F or go to the ‘Find’ drop-down on the ‘Home’ tab and select ‘Advanced Find….’
If you don’t see the full dialog box, click the ‘More >>’ button:
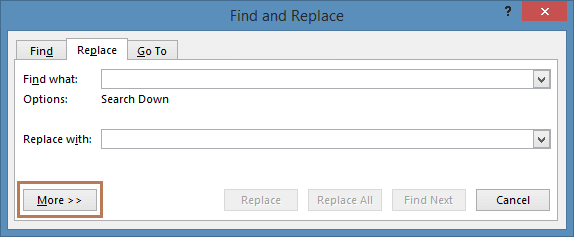
Clear the ‘Find what’ box and click on the ‘Format’ dropdown on the bottom of the dialog.
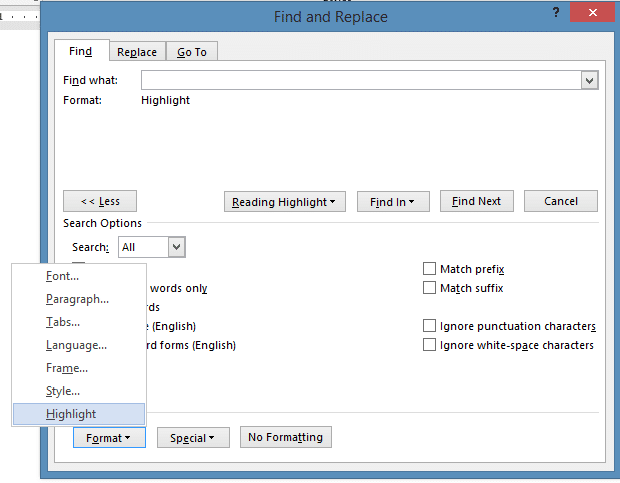
Select ‘Highlight’ and click the ‘Find Next” button. If there are any stray placeholders left, this should find them:
Once you have found the placeholder, make sure that you select the entire placeholder then follow the steps listed above.
To find the red placeholders, simply follow the same steps as above but select ‘font’ from the ‘Format’ dropdown.
To Review:
The Four Steps to Perfect Placeholders
1. Single terms, no spaces

2. Consistent naming convention

3. Distinctive visual cue
(Make this consistent too)
4. But not the first character


Automating Microsoft Word Documents from Excel
This is a live demonstration of Expedience Software’s ability automate branded Microsoft Word proposals from content and data selections in Microsoft Excel. Ideal for statements of work (SOWs)& proactive sales proposals.Transcript: Hi there. I'm Jason Anderson...

Copilot Excel Questionnaire
In this video, we explore how Microsoft Copilot can be used to answer Excel RFP questionnaires. We'll discuss the importance of prompt engineering, cleaning up old questionnaires, and uploading them to Copilot for processing.Transcript Microsoft Copilot can be used to...

Collaborate with Subject Experts
This video discusses how Expedience Software helps resolve the challenges of coordinating proposal contributors and collaborating with subject experts. Learn More

Excel-Based RFPs
If you are forced to respond to RFPs issued in Microsoft Excel, you’ll want to see this video. Leverage the Expedience content library to automate responding to these challenging RFPs. Learn More

Proposal Styles & Formatting
Presentation, branding, and formatting matter! Watch this video to see how Expedience Software ensures 100% branding compliance with the Style Palette for Microsoft Word. Learn More