Use Document Header to Secure Full-Page Images
Adding a full-page, edge-to-edge image to a document cover page can produce a dramatic effect but can make adding titles and other text difficult. Insert the image into the header section and secure the image without affecting text elements.
Setting the Header to First Page Only
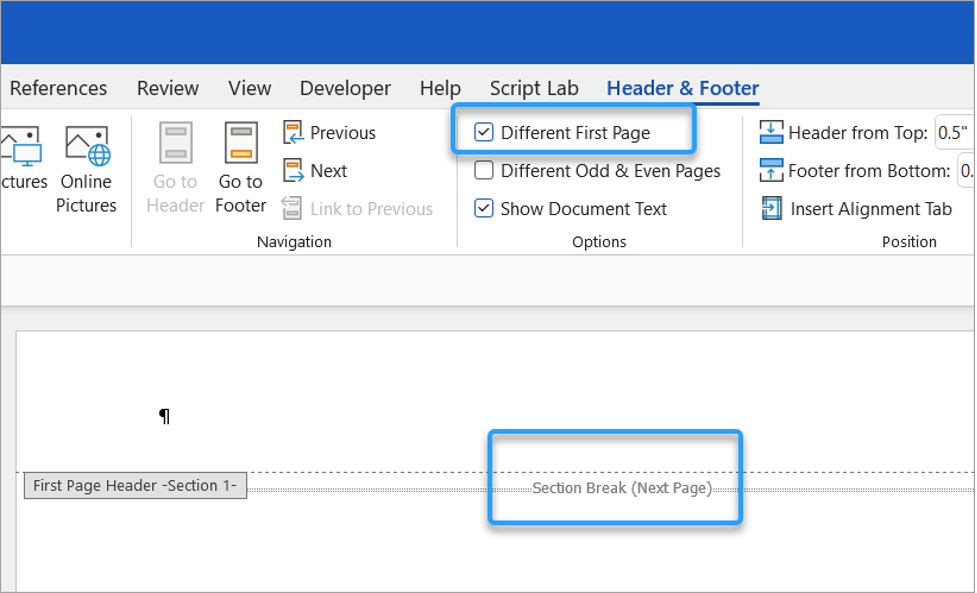
Before inserting an image into the cover page header, make sure to first insert a Next Page Section Break (Layout > Breaks > Next Page). Go to Insert > Header > Edit Header to open the Header/Footer editor. Check ‘Different First Page.’ This ensures that the cover page image will only appear on the cover page.

Inserting an Image into the Header
Insert the image at the top of the Header. Copy/Paste the image or insert the image from a file (Insert > Pictures > Insert Picture from this Device.)Align the Image to the Edges of the Page
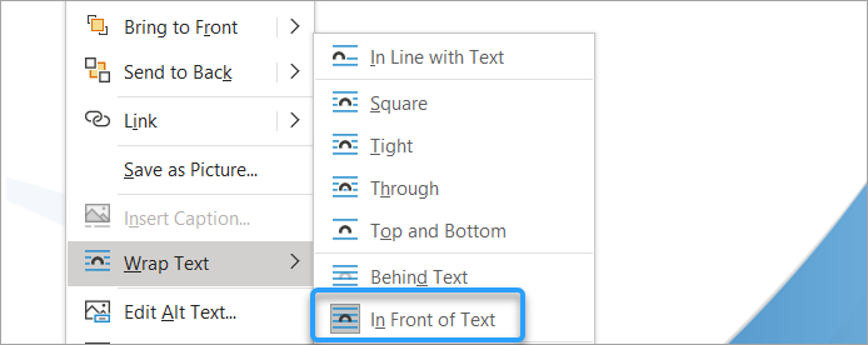
To align the image to the top left edge, select the image, go to the ‘Picture Format’ tab, click ‘Wrap Text,’ and set ‘In Front of Text.’
Add Text to the Cover Page
Now that the image is secured to the background header, you can now add text to the cover page without affecting the image position.
Expedience Style Palette Ribbon Contains Gallery of Cover Pages
Expedience Software provides a formatting solution that resides as a Ribbon directly on Microsoft Word.
This ‘Style Palette’ ribbon provides galleries of reusable content and images, including headers, footers, and cover pages.


