
Storing lengthy files in a content library is NOT recommended. It will slow overall performance and be difficult to maintain. Only content intended to be inserted into a document should be housed in a content library. Extensive supplemental reference materials should be stored in a directory like SharePoint.
Fortunately, Microsoft provides two powerful methods for searching for relevant file content:
- Windows Advanced Search
- Microsoft Copilot Agents
Creating a Resource Directory
Creating a Resource directory on SharePoint can provide many of the same advantages as a content library. This will provide a central location as well as make the content available to Microsoft Copilot, which we will detail later.
What Kind of Files Should be Included?
Word documents are simple to search and reuse, but you can also include PDFs, Excel files, and images. Proposals, past performance documents, and other files containing useful content can be included.
There are several ways to organize a directory. You can save copies of all completed proposals or just those deemed most useful. Subfolders can be organized by file types and topics, and an archive subfolder can be used to separate older files.
Using Windows Search
SharePoint provides search capabilities, but Windows File Explorer is often preferred for its user-friendly features. Windows File Explorer supports content search, property search, and sorting and includes a preview window that allows users to view files and copy sections directly from the preview pane.
In order to use File Explorer, you must first sync the SharePoint library with Windows. To do this, open the desired SharePoint Library and click ‘sync’ or ‘Add shortcut to OneDrive’ at the top of the screen:

Previewing Files in File Explorer
To preview a file, select it and click ‘Preview’ under the view dropdown. You can view the entire file and copy selected portions.

Editing Meta-data in File Explorer
Select ‘View Details’ from the View menu to switch to a meta-data view. Here you can see details about the file:


File Indexing
Windows Search works best with files that have been indexed. By default, Word documents and PDFs are set to index content. To check this, go to Control Panel > Indexing Options > Advanced > File Types:

Searching in File Explorer
To search in File Explorer, open the desired folder and enter a term into the search bar. File Explorer searches file names, content, and properties like Author, Title, Subject, and Tags. Files that match the name or contain the search string are ranked higher than those matching only metadata. The order of terms in the search string affects relevance, with exact matches ranked highest.
Tips on Searching in Windows
- Exact Phrase: If you’re looking for a specific phrase, enclose it in quotation marks.
- This NOT That: You can filter those out by using the NOT operator.
- Required Words: Make words with the plus ‘+’ operator.
- Wildcard With *: The asterisk (*) is a wildcard that can stand in for other characters.
Leveraging Microsoft Copilot Agents
Another method for searching a directory of resources is to create a Microsoft Copilot Agent designed to focus exclusively on that directory.
Like Windows Search, you must collect your files into a SharePoint library. However, you do NOT need to sync the files to make use of the Agent.
Copilot Agents can be made by using Microsoft Copilot Studio. See the Copilot Agent tutorial below:
How to Make a Copilot Agent and Why You Need One
Once you have a Copilot Agent available, it can be used to search and access content from your resource directory.
Sample Past Performance Agent
As an example, we will use an un-synced SharePoint directory of documents detailing TechThink’s past performance. In our scenario, TechThink has a current opportunity with a manufacturing company that operates in the United States and Mexico.
Rather than simply searching for keywords, we can construct a more comprehensive request with the following prompt:
Task:
You are a proposal writing professional for TechThink, a SuccessFactors implementation company. You specialize in creating persuasive, business-winning proposal content. Your task is to identify optimal past performance content to provide to a current proposal customer based on how closely the past performance files of past customers align with the proposal customer. Use only the content provided in the Past Performance files. Do not invent.
Focus on the following 3 key criteria. Prioritize these criteria in the order given.
- Industry: Manufacturing
- Countries: United States, Mexico
- Languages: English, Spanish
Output:
Create a list summarizing, at most, the top 5 past performance files.
Only include the criteria listed above. If there are not enough files for a top 5, only include the files that match exactly.
With this prompt, we have directed Copilot to find documents with specific industries, countries, and languages listed, and summarize them in a list. It will also provide a list of links to the referenced files themselves.
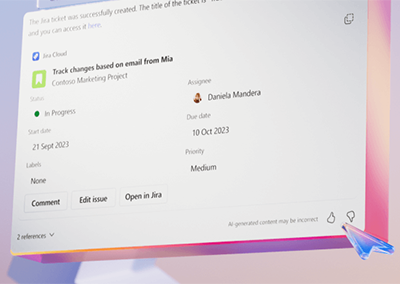
In the Copilot pane in Word, first select the Past Performance Agent. Enter the prompt and run. The following shows the result in the Copilot pane:

Clicking on a document’s link will open it in your web browser.

Benefits of Copilot Agents for File Search
- A Copilot Agent can be applied directly to files on SharePoint and OneDrive without requiring syncing with Windows.
- Agents can parse the “meaning” of the content of files. If you do not know what specific keywords to search for, you can simply describe the type of content that you are looking for.
- Agents are interactive. You can ask the Agent to explain why it returned the documents it did or even ask it to expand or restrict its results.
- Copilot Agent allows us to perform highly sophisticated and specific searches with natural language. Note that in the example above, Copilot searched for five terms across three separate criteria and returned the exact results we needed without needing to use elaborate search functions.
- A Copilot Agent can also provide summaries of important information, thereby providing better guidance in locating the most relevant files.

Jason Anderson of Expedience Software to Address Why Proposal Technology Investments Fail at APMP BPC 2026
Denver, CO — May 13–16, 2026 — Jason Anderson, Executive Vice President of Sales and Marketing at Expedience Software, will present a featured session at APMP’s Bid & Proposal Conference (BPC) 2026, May 13–16 in Denver. APMP’s Bid & Proposal Conference is the...
Expedience Software Joins Microsoft AI Cloud Partner Program to Deliver Copilot-Powered Proposal Automation in Microsoft Word
Partnership highlights the benefits of combining Microsoft Copilot with Word-native proposal automation to accelerate RFP responses and improve complex proposal quality. Manchester NH, March 19th, 2026 — Expedience Software, a provider of proposal automation solutions...
Expedience Software Recognized as a Representative Vendor in the 2025 Gartner® Market Guide for RFP Response Management Applications
MANCHESTER, NH — March 4, 2026 — Expedience Software, a leading provider of proposal automation technology, today announced its featured inclusion Gartner's recent proposal software market report, Market Guide for RFP Response Management Applications. Expedience...

Expedience Software Highlights the Unique Roles of Proposal Automation Software and AI in Proposal Creation
MANCHESTER, N.H. – June 18, 2025 – As businesses refine their approach to RFP response and proposal automation, understanding the distinct yet complementary roles of traditional proposal content libraries and AI-driven tools has never been more crucial. Both...
Expedience Software Introduces Expert Proposal Prompt Engineering with the CRAFT Method
MANCHESTER, N.H. – May 8, 2025 – Expedience Software Introduces Expert Proposal Prompt Engineering with the CRAFT Method Expedience Software unveils a cutting-edge approach to proposal writing by leveraging the power of prompt engineering. This innovative technique...